How we make handmade furniture

If you are wondering how we make handmade furniture, handmade wood furniture you have landed on the correct page. Yes, you don’t need to be a master craftsman to produce the furniture by yourself. You just need to take care of a few things to make furniture and rest on that. In this post, we will provide every step to manufacture furniture manually. So, brace yourself and get ready to produce awesome-looking furniture.
Table of Contents
How we make handmade furniture
In the next twenty-odd steps, you can learn how we make handmade furniture
Step 1: Plan precisely
Planning is essential for every task; whether you plan to make furniture or plan for any other activity, proper planning is essential. You need to be aware of the dimensions, type of fixture you are going to do, the joinery type, the finish you are looking for, etc. These factors will decide the final outcome of your furniture.
So, to begin your journey as a furniture maker, first draw the sketch. The sketch can be designed using your computer software, or even handmade is enough. If you are familiar with computer software, use Solidworks or Sketchup to give an outlook for your design. Then determine the cut list required to make furniture. By doing so, you can figure out how much sheet goods and lumber you require, and it gives you a rough estimation of the overall cost. Add about 30% extra lumber to the list since there will be a chance of waste since you are not a craftsman yet!
Once you are ready with your design and cost estimation, you can decide whether you can afford this project or not. If you can, then prepare a detailed plan by giving attention to every part. Precision is needed when doing the furniture and when the use of machinery and other tools will start, you need to be accurate.
Step 2: Start your preparation.
It is obvious for us to get tempted once we gather everything that is required to build furniture. But the best advice is not to do so. Especially if you are doing this type of work for the first time, you must do a little practice before touching the real piece. Pick up some curved or weird parts and start practicing with a piece or two. If you are really confused about how we make handmade furniture, you must practice before touching the real piece since there is a chance of ruing the real piece, and it will result in a delay in completion of the project and additional cost.
Step 3: Be ready with tools.
Tools are the key in producing the furniture, and the availability of the right tool is required to complete your project as planned. The gathering of essential tools such as power jointer, handsaw, circular saws, jigsaw, combination square, glue, power drill, chisels, joinery gadgets, hammer, screws, screwdrivers, and workmate (if you need additional hands). The most important thing is to ensure whether all tools are in the right condition and ready to start working immediately. Many times, accidents occur because of dull blades. Hence, make them sharp and gather if you are missing any equipment.
Step 4: Select the right wood.
The most important thing in making handmade furniture is the selection of the right types of woods. So, choose your wood by paying detailed attention. The lumber should be straight, and avoid selecting the wood with fissures at the end, bowing, knots, resin pockets, curves, and cups. If you are unable to get all straight lumber, plan your cuts wisely by eliminating unwanted stuff.
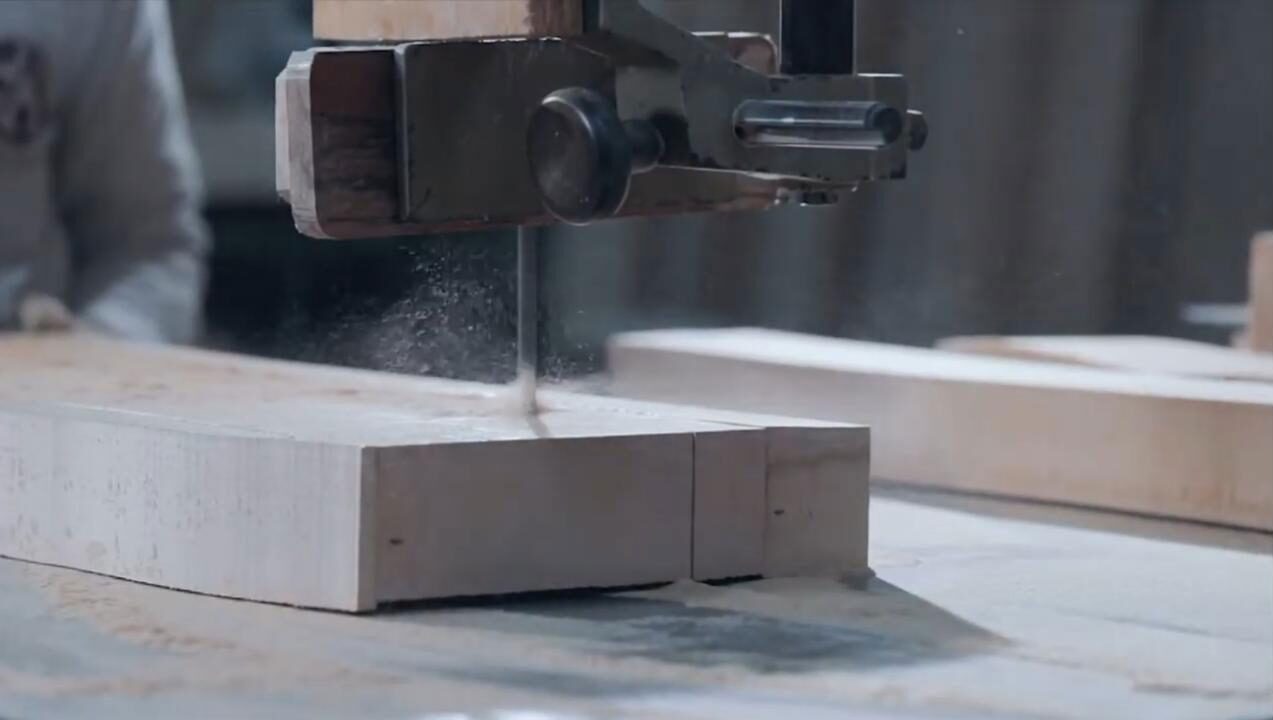
So, draw on wood using a chalk piece or marker to ensure where everything fits. Select the grain as per your requirement and plan your cuts to continue the flow throughout your project. It is recommended to make cuts half-inch wider & one inch longer than actual measurements to provide the additional room to make last-moment adjustments to fix all the parts together. Once you are sure about the measurements, cut the lumber using the radial saw.
Step 5: Now work with Panels.
If you need panels to make, then go to your table saw and cut lumber to two to two and a half inches. Accurately cut to keep the boards and try to keep grain pattern. If your boards are cupped, ensure your shining face is up.
Step 6: Jointer
Start identifying the pieces at the end of the lumber to keep track of them. Adjust your fence to the required width and make sure it is 90 degrees after that; adjust your table for the cut of 1/16 inch. While doing these works, make sure to wear your safety goggles and make use of push sticks.
When applying the pressure for cutting the planks, aware of the ideal pressure because you don’t need the same level of pressure for working on softwood as you need for hardwood. Beware, thickness planer and jointer can rip chunks of hardwoods if you are working on the wrong side of the grain.
Hence, plan accordingly about the pressure and right side of the lumber. Then pass one edge and one face on the jointer & identify the same to use on your thickness planer and table saw. If you are preparing panels, make one face and two edges and apply glue to them. For your future reference, mark on the sides for joining.
Step 7: Things to do using the table saw.
If you are dealing with long pieces (more than 72 inches) in the table saw, be careful about the lumber’s tension. It can cause a bow or curve so, plan accordingly so you can go back to the jointer and make corrections. Keep the mark you previously made on your pieces’ edges on the table saw fence and rip them. Always make sure to pass wood on the long side; if the pieces are wide, more than long, use a chop saw or crosscut sled. And keep blade height to keep one teeth over your board.
Step 8: Start playing with glue.
Now prep clamps for panels and check the harmony of grains and determine which piece fits where. Identify the growth rings and ensure that they don’t go in a similar direction from one piece to the next to get as strong a panel as possible. If you trace the rings, you will get less chance of becoming confused. Apply glue on one side of each piece and keep the clamps at a distance to maximize contact with the glue. You can use as many clamps as you require. In an ideal scenario, you can find a 45-degree line from one clamp to another. If this is so, you can know the pressure is distributed evenly. If you are working with softwood, use martyr between clamps and panels to avoid the marking of clamps.
Step 9: Thickness Planer.
Now read wood grain and feed board according to blade rotation of planer. Put the identification you made on the wooden plank’s face while placing the jointer face downwards on the table. If the wood you are using is hardwood, you easily go up to 1/32 inches to get the desired thickness. Once the blade touches all the surface of the lumber, flip over the piece.
Step 10: Cut in length.
Use the miter saw and cut the pieces into length. If you prepared panels cut all of them using a circular saw or panel saw. And if possible, take help from a guide, so they will let you know if you are not cutting straight. You should start by making the zero cuts first, which means cut anyone end of the wood and ensure the cut is straight and then flip it, measure, and cut it as per your desired length.
Step 11: Tracing
Now you are ready with all the parts that are cut as per your requirement. Now you need to put marks on every part to know which plank goes where. So, you should look for the grain pattern and match all the components. After that, put a mark on the lumber that becomes the face of your furniture. Now try to trace everything that is needed to do tenon, rabbet, joints, etc.
Step 12: Use of machines
In this step, you start to get assistance from the machines. It is time to put everything into the machine. If your furniture requires a lot of work from the machine plan, the exact order to ensure operations will flow as per logic and easy to follow. Let’s say if you have mortise & tenon joints begin with mortises. Then try on a martyr. After this, clean mortises using the mortising chisel. Then machine Tenos and put dadoes on the table saw and ensure to bring the mortise, they must fit correctly. Since you are cutting on the wide side, use a crosscut sled.
Step 13: Router
Next, you need to work with a router. Go to your router and put balanced pressure across the pieces so they can come out perfectly. Be careful about the router blade to avoid hurting yourself. Ensure you adjust the fence with the bearing of its bit. To avoid ripping chunks out of it, perform successive passes. If your wood selection is hardwood, it is recommended to round the edges to make it less aggressive. To minimize the blowouts, put martyr at the end while working with end grain.
Step 14: Raised Panel
If you make raised panels on the router or shaper, don’t forget to put a face on the table. Then do a lot of passes with 1/16 inches increments. Once the machine is set up, properly test the fit with its frame.
Step 15: Make dry fit.
Before you apply glue to all parts of the furniture, ensure everything is in its designated place. To make sure of this, just do a dry assembly. Once you are satisfied with the arrangement, proceed to apply glue.
Step 16: Dyes and stains
The real look comes to any furniture with the application of stains and dyes. If you are experimenting with the new color, make a test on waste pieces. You need to sand the furniture parts to provide an excellent finishing look. In case you are using blotchy wood such as cherry, you need to seal the wood before using dye or stain on it. You can use half lbs shellac and apply it cleanly to all parts of the furniture. Wait till it dries and again sand it; this will help the wood absorb the color perfectly and evenly.
Step 17: Do a final sanding
Now everything is in its place and fitted perfectly. And your furniture is now looking great. Now the time is up for final sanding and sand with 120 grit and ends rain areas to 220- 320, and it will help the wood absorb the color evenly. Trace lines on the wood with a pencil; it would help you determine whether sandpaper reached everywhere. And it avoids the deformation of furniture with over sanding. Then check whether all marks of sander are gone.
Step 18: If needed, do the branding
If you like to make branding, you can create a brand as memory or just to get fun. It is quite an amazing journey from worrying about how we make handmade furniture to think about branding.
Step 19: Paint
Now again, apply dyes; if the stains are made with the solvent base, you must wear protection to your face and hands. Protect all your surroundings and plan your sequence of staining. Once the staining and dye are done, let it dry for a few hours. Ensure to keep the surface is not touching the ground till the stain or dye gets completely dried.
Step 20: Give a Finishing touch.
The finishing touch provides a look and shines to the furniture. Once the color came out as desired and even, you can use varnish and do the finishing touch on your work. Before putting varnish, seal the wood using a commercial sealer or with oil to limit fluctuations from the changes in humidity or room temperature.
Step 21: Enjoy your work.
That is it, with your hard work you can produce excellent furniture on your own. Just admire the beauty of it and enjoy it. Take note of the things that went well and things that went wrong; this will help you produce even good-looking furniture in the future.
Some Easy Build hand-made furniture.
Now, you know how we make handmade furniture, handmade wood furniture but furniture is a vast category, and it includes several things such as chairs, tables, cot, etc. So, if you are looking to knock down the easier target first, here are some furniture ideas that you can build easily.
Benches
Benches are very easy to build, and if it is your first adventure with woods, you can try this first. Another good thing is it does not require a lot of material and a whole day.
Shelf Life
The shelf is a smart way to store your things and books without occupying more space. Plus, this arrangement provides an excellent look to your living area or bedroom.
Slim Storage
In a home, how much storing space you create, you or your house member will ask for more. And in those situations, you need extra furniture to store the things. But thankfully, you know how we make handmade furniture, and with this knowledge, you can create a slim storage table. This type of furniture is ideal for a narrow span wall. You can connect dining table legs to the top and bottom of this furniture. It is more of a proper assembly than creating from scratch and requires fine dyeing and finishing.
Indoor Swing
Resting in the swing is fun but making it by yourself and resting on it doubles the joy. The hanging canvas chair is the perfect choice for resting and enjoying for both adults and kids alike. You need a few stitches, a few simple knots, and drills. For the outfit, you can choose the color of your choice. And for safety reasons, don’t forget to secure your swing to stainless steel spring and link it to the ceiling.
Industrial style furniture
Making industrial style furniture such as tables is not a complex as you think. You require a few lock washers, bolts, and nuts and use plywood plank to make a tabletop.
Do a bed frame
Building a bed frame with minimum resources is possible. With the bed frame, you can sleep peacefully, plus it can become a storing space for your clothes and other belongings, and the great part is no one would notice it.
The other easy-to-make handmade furniture, handmade wood furniture is as follows.
- Deck Chairs
- Storage furniture
- Road sign stools
- TV stand
- Floating shelves
- Animal house
- Armrest for sofas
- Showcase compartments
- Seat and step stool etc.
Even though building furniture from scratch is not a complex task, it needs proper attention and skill of following the instructions provided above. So, pick up your tools and material and build something that pleases your mind.
Contact our best discount furniture stores near me U-Trade Furniture.


